Sunday, December 25, 2011

FF: Christmas!

Friday Fingers

Merry Christmas!!!!

I know my FF this week is kinda late. But it's Christmas and there are lots to do during Christmas other than painting nails right? ^__^

Anyways, just to show my Christmas nail art. Pretty simple cos I didn't have much time to spare since the rest of the family members are here at home for the long holidays and it is so much fun when the house is filled up with noise and laughter from loved ones.

Christmas nail 2011 (1)

Christmas nail 2011 (2)

*nail hug*

Monday, December 19, 2011

FF theme: All about Christmas!

Friday Fingers

6 days to Christmas!
And I'm sure you know what's the theme for our next FF.

All about Christmas!

So yeah, let's bring out our Christmas nail for this coming Sunday, shall we?


How to:

  1. Copy the badge above.
  2. Paste the badge on your FF: All About Christmas post and insert the URL link of this page (FF theme: All About Christmas) on the badge.
  3. Publish your FF: All About Christmas entry.
  4. Come back to my FF Theme post by clicking the banner on your entry.
  5. At the bottom of this page, find 'You next, click to enter'.
  6. Fill up the requirements in Linky Tools form. Make sure to fill the URL of your FF: All About Christmas post.
  7. After you are done, go back to this page again and look for 'get the code'. Copy and paste the code at the bottom of your FF: All About Christmas entry.
  8. We are linked for Friday Fingers!

Ho! Ho! Ho!

*nail hug*

PS:
I extended the closing date since my time is tight with Christmas prep and I believe you too. ^__^


Friday, December 16, 2011

My Stash

Whenever I visit nail art websites, I'm always in awe drooling at these nail bloggers' stashes. Their collection of nail  polish that range from the famous OPI to China Glaze to Orly to Zoya and many more nail polish brands makes me more than eager to have my own collection too.

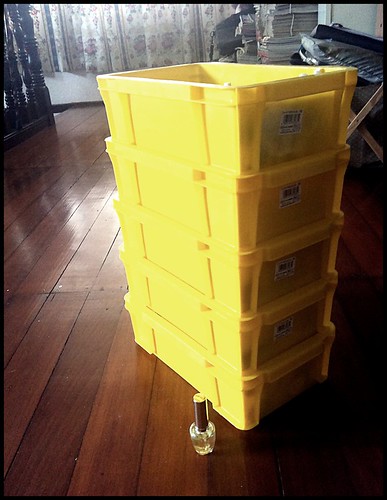
Last week, I just purchased 5 plastic containers that can be stacked on each other. I couldn't afford to buy proper drawers for my nail stuffs yet so these plastic containers should do for the time being.
IMG_2504

On the bottom container...
IMG_2507
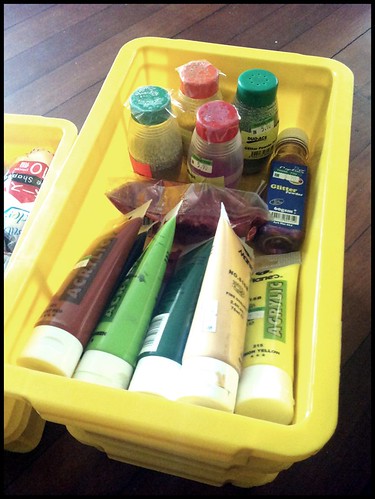
I placed all my acrylic paints and art glitters. I wish that Santa will get me an acrylic paint set this Christmas ^__^

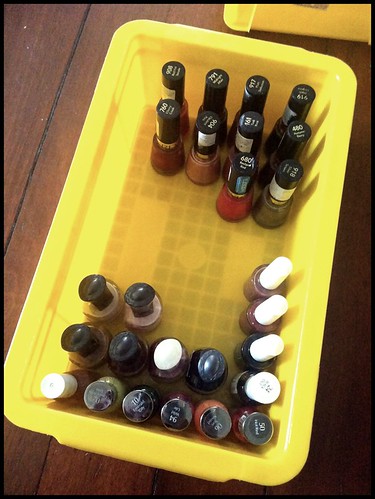
Second from bottom...
IMG_2502
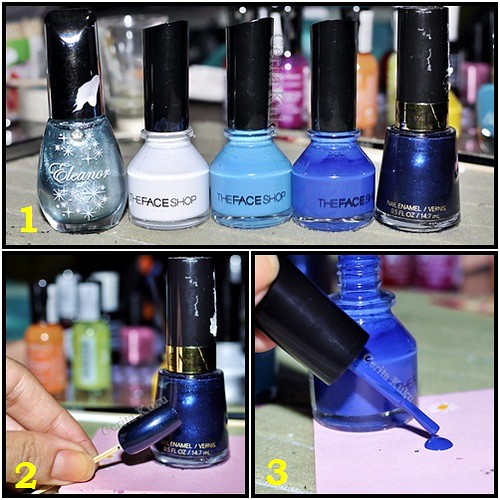
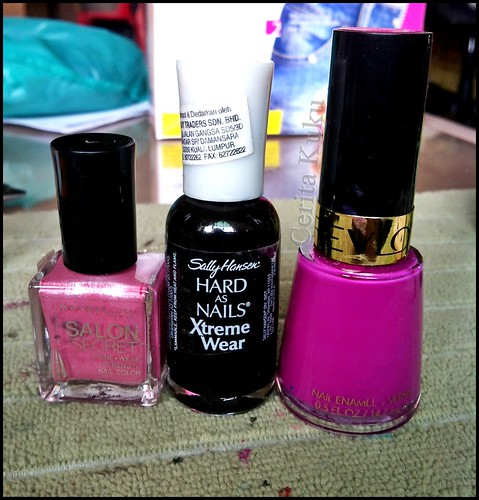
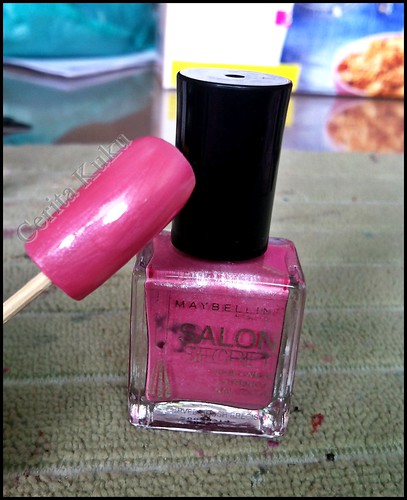
...nail polishes/cracks from Faceshop, Sasatinie, Eleanor, Maybelline, Silky Girl and Wet & Wild.
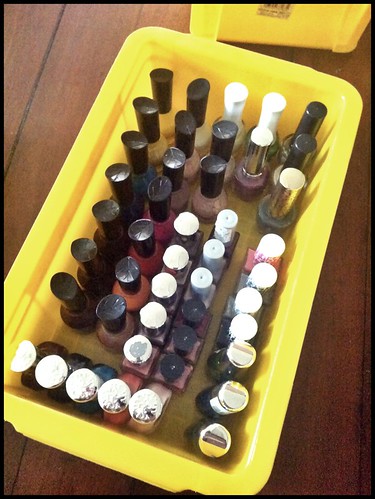
3rd from bottom...
IMG_2501
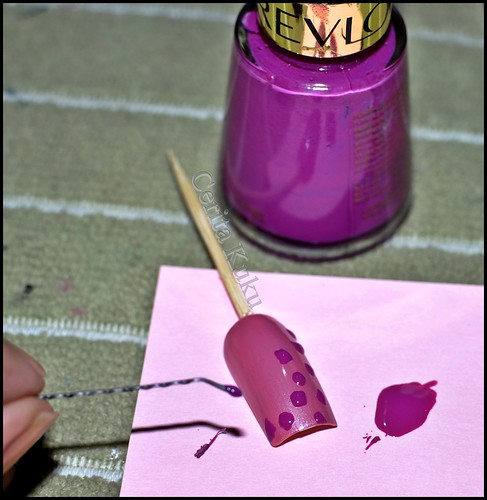
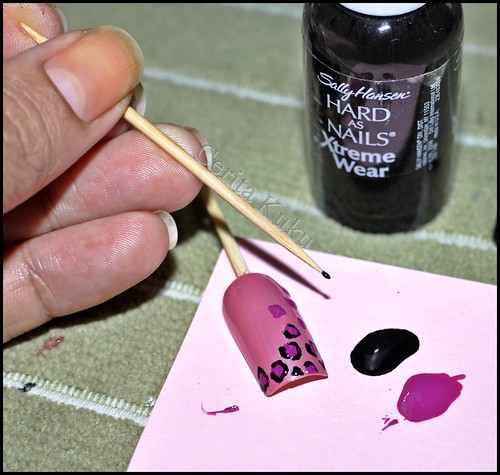
My Revlon, Sally Hansen and Elianto nail polishes (not including the recent haul from Elianto).

2nd from top...
IMG_2506
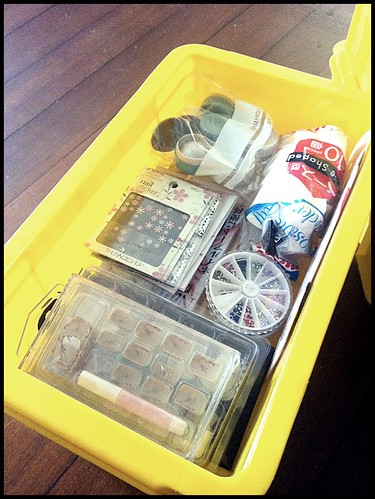
Rhinestones wheels, nail art stickers, nail art foil, artificial nails and make up sponge.

Top container...
IMG_2505
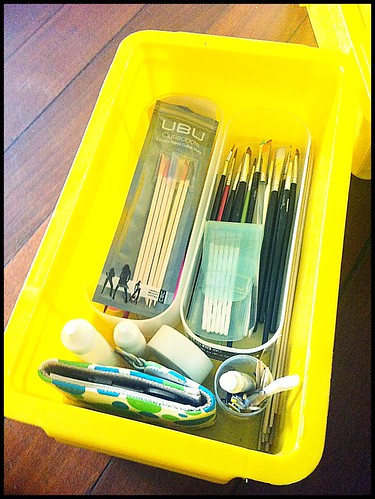
...all my nail art tools; dotting tools (thanks Lizee), brushes, manicure set (thanks Lizee), cuticle remover, nail glue, orange stick, cuticle clipper and nail buffer.

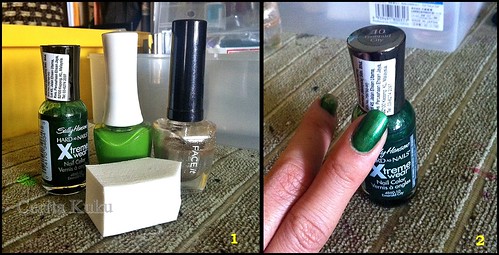
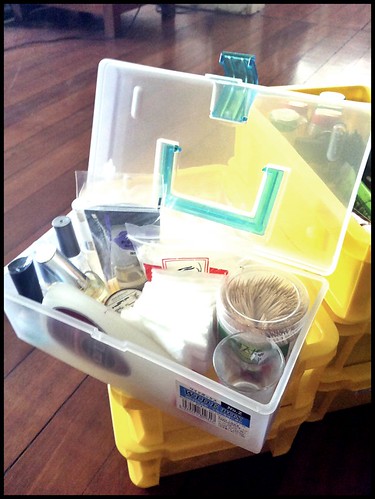
And finally, my mobile nail art container. But I usually keep all my base and top coats here as well as nail polish remover, polish thinner, facial cotton and toothpicks inside.
IMG_2508


I am so hoping that I will get at least an OPI nail polish for Christmas to add into my collection bin.  *finger crossed*

Lizee and Edith, are you guys building up (in numbers) nail polishes too now? ^__^

*nail hug*

FF: Tribal print

Friday Fingers

TGIF!
Not that I feel it so much since I AM on holiday till end of the year. ^_^

Anyways, here's my FF for this week.
Gotta say, this is the hardest FF so far. I just couldn't get the lines straight and balanced. Wanted to use tape but it will be very time consuming.

Initially, I wanted to incorporate the Aboriginal's art but I couldn't come up with a suitable design. I don't want to end up with having just round/circle design over and over. For now, this will do.

Pardon the not-so-straight lines.
DSC_5187

DSC_5199

Happy weekend ya'all!

*Nail Hug*

Monday, December 12, 2011

How To: Green gradient

Another tutorial on gradient using the sponging technique. I just love sponging. The difference in colors post sponging is really subtle yet you know there's more than one color blended together.

STEPS

1. Basic things needed for this particular design.
2. After applying base coat, paint the base color. In this case, dark green is the base color.

IMG_2509-horz

3. Blob the second green, much preferable lighter than the base color.
4. Using the make up sponge, dab it on the polish and then dab randomly on the nail. Make sure to leave a little bit of the base color unsponged to create the gradation.
5. Repeat Step 3 and 4 with the gold nail polish.
6. Dab a little more intense on the tip to get the gold color popped out.
page

The finish result!
Green gold gradient (4)

Level of difficulty: 1 of 5

Try and experiment with different colors!

*Nail Hug*

FF Theme: Tribal Print

Friday Fingers

Happy Monday!

One more weekend before Christmas! Woohoo! Have you thought of any Christmas nail designs to be worn on during Christmas time? Well, if yes, that's good! After this week's FF, it's gonna be all about Christmas. So get your Christmas nail designs ready!

For this week's FF, it's gonna be.... TRIBAL Print!!!

This design is an 'acquired taste' I must say cos it usually involves loud colors and complicated lines and strokes that can make the design look messy or 'crowded'. But, if you are able to pick one with great color combo and lines/dots that are less crowded....this tribal print can look so great on your nails.


How to:

  1. Copy the badge above.
  2. Paste the badge on your FF: Tribal Print post and insert the URL link of this page (FF theme: Tribal Print) on the badge.
  3. Publish your FF: Tribal Print entry.
  4. Come back to my FF Theme post by clicking the banner on your entry.
  5. At the bottom of this page, find 'You next, click to enter'.
  6. Fill up the requirements in Linky Tools form. Make sure to fill the URL of your FF: Tribal Print post.
  7. After you are done, go back to this page again and look for 'get the code'. Copy and paste the code at the bottom of your FF: Tribal Print entry.
  8. We are linked for Friday Fingers!

Go tribal...Roarrrrr!

*Nail Hug*


Thursday, December 8, 2011

FF: Green Gold gradient

Friday Fingers

Hi!

I hope you guys had fun ogling at my Christmas nails as much as I do. And I have actually did four more Christmas designs but more on blue color theme. Anyways, that have to wait.

This week's Friday Fingers, I went for green and gold. I wanted to do blue again cos I'm just so in love with Revlon's Midnight Affair. But I have not been pulling out green in ages so I thought, why not?

I used Sally Hansen's Emerald City as base. Upon dry, I sponged on Faceshop GR502 followed by Faceshop GL111 . I topped them off with Faceshop 05 and a coat of Sally Hansen Double Duty Base & Top Coat. On my ring finger, since I couldn't get rid of my pride on being able to create a Christmas design of my own... I have to show off this one again. ^__^

Green gold gradient (4)
If you noticed, I did not paint plain green in one or two of my finger nails like I normally do. Having all nails painted with fancy nail art seem to attract attention so I usually paint one or two nails with plain base color to tone down the attention. However, for this nail art today...I think having plain green on one or two nails could draw more attention. And somehow, I feel the gold is able to tone down the attraction so that's why I did gradient on all nails. Besides, the snow man nail art is already the feature nail on my fingers. ^__^

Green gold gradient (5)

I have to say that I really enjoy doing this week's FF and like how it turned out on my nails.

What do you think?

*Nail Hug*

Wednesday, December 7, 2011

Christmas nails!

Hi!

I have been browsing Christmas nail arts since November and to tell you the truth, there are so many out there that I want to do. So pretty!

For a start, I painted these Christmas designs with my niece and will decide which one will be my Christmas nails. However, there are still so many beautiful designs to do and I doubt I will stop with just these.

Christmas sets 2011 (1)copy

1 - Santa's Suit. Re-created this from Beauty Judy.
2 - Christmas Tree ala Polka Dots. Re-created from Simply Rins.
3 - White Christmas Tree. Found the design from stockfresh.

4 - Proud to say, this is my own creation. I was supposed to do just gradient green and gold. Somehow, after finishing up design number 3, the idea to paint snow man on it popped up. What do you think?

Christmas sets 2011 (3)copy
5 - While searching for Christmas nail art inspiration from the net, saw many nail bloggers did Santa's Hat. Thought that this design is kind of cool too so I re-created this. A red Santa's Hat with dash of golden dots.

Have you done your Christmas nails?

*Nail Hug*

Monday, December 5, 2011

FF Theme: Gradient

Friday Fingers

Lately, I've seen many of the nail bloggers I love are into gradient nail art and they did oh so pretty that I so want to do gradient nails myself.

Let's do Gradient this week ladies!

How to:


  1. Copy the badge above.
  2. Paste the badge on your FF: Gradient post and insert the URL link of this page (FF theme: Gradient) on the badge.
  3. Publish your FF: Gradient entry.
  4. Come back to my FF Theme post by clicking the banner on your entry.
  5. At the bottom of this page, find 'You next, click to enter'.
  6. Fill up the requirements in Linky Tools form. Make sure to fill the URL of your FF: Gradient post.
  7. After you are done, go back to this page again and look for 'get the code'. Copy and paste the code at the bottom of your FF: Gradient entry.
  8. We are linked for Friday Fingers!


*Nail Hug*

Friday, December 2, 2011

FF: Inspired by Design

Friday Fingers

This week's FF was supposed to be fun for me. But I got carried away with too many inspired designs in mind and ended up doing something common to my previous works. I even got pissed off during the progress because I was a bit rushing and ruined my first attempt. Even on my second attempt, I smudged a bit of the blue dots. *sigh*

Anyways, enjoy my FF this week.

DSC_4771copy

DSC_4772

The design on my blue polka dot dress that inspired this week's FF. Instead of using lighter blue, I opted for this Revlon Midnight Blue color. Some bad lighting here, couldn't see the beauty of this dark blue hue.
DSC_4774

*Nail Hug*

Tuesday, November 29, 2011

FF Theme: Inspired by Design

Friday Fingers

Wow! It's the final week of November already. For the Christians, it is the first week of Advent and Christmas is drawing near. *excited*

As much as I want to have Christmas theme for our FF this week and leading up to Christmas, I better not. So I have come up with this theme and I hope you girls will be able to follow. This week's FF theme is Inspired by Design.

I'm sure you have a certain design/graphic that you love on your dress, work outfit, table cloth or even curtains, right? So be inspired by one of these. Well, I do have one and I'm so gonna try it painted on my nails this week.

How to:


  1. Copy the badge above.
  2. Paste the badge on your FF: Inspired by Design post and insert the URL link of this page (FF theme: Inspired by Design) on the badge.
  3. Publish your FF: Inspired by Design entry.
  4. Come back to my FF Theme post by clicking the banner on your entry.
  5. At the bottom of this page, find 'You next, click to enter'.
  6. Fill up the requirements in Linky Tools form. Make sure to fill the URL of your FF: Inspired by Design post.
  7. After you are done, go back to this page again and look for 'get the code'. Copy and paste the code at the bottom of your FF: Inspired by Design entry.
  8. We are linked for Friday Fingers!


*Nail Hug*

Friday, November 25, 2011

FF: Fusion French

Friday Fingers

Hey!

I am so happy that today is officially the start of my month-long school holiday. More time to plan for Christmas and definitely, time for nails. Ha!

Here's my Friday Fingers for this week. A simple French with some dots to add a little twist to the classic French. I opted for this dark red base and gold for the tips and dots.

DSC_4458

DSC_4469

How do you do your French?

*Nail Hug*

Wednesday, November 23, 2011

FF Theme: Fusion French

Friday Fingers


Hi!
Apologies for the late post on the FF theme for this week. If it's not Lizee who reminded me about it, I would have kept delaying till it's already Friday.

Anyways, as suggested by her (Lizee), this week's FF theme will be French Manicure. But, let's ditch the conventional French OK? Let's go outside the box and do some twist on it. You know, like adding dots or lines or marble or more colors instead of the usual nude and white or ANYTHING to your French. More fun that way I think.

*Updated: Linky Tools is back.

How to:

  1. Copy the badge above.
  2. Paste the badge on your FF: Fusion French post and insert the URL link of this page (FF theme: Fusion French) on the badge.
  3. Publish your FF: Fusion French entry.
  4. Come back to my FF Theme post by clicking the banner on your entry.
  5. At the bottom of this page, find 'You next, click to enter'.
  6. Fill up the requirements in Linky Tools form. Make sure to fill the URL of your FF: Fusion French post.
  7. After you are done, go back to this page again and look for 'get the code'. Copy and paste the code at the bottom of your FF: Fusion French entry.
  8. We are linked for Friday Fingers!


Go French (mani)!

*Nail Hug*

Friday, November 18, 2011

FF: Neon Colors

Friday Fingers

Friday Fingers time!

I didn't have much time to spend this week since it's the final week before holiday and usually is the most busiest and crucial week. I think nail marbling has become very handy to me since the Eureka moment and I've been doing it like a piece of cake. No kidding!

So for this week FF: Neon Colors, I picked orange and lime green colors and did nail marbling with a lil' bit of dots detailing on the marble design. Why orange? Simply because our school's annual dinner picked Orange (and black) as the theme color. So Orange/Lime Green wet marble nail art is just fit for the theme. :)

DSC_3631

Although, I have to admit I am not really impressed of how this nail result turned out. I just didn't have time to 're-produce' a new design, in time for FF. But anyways, hope you enjoy looking at my FF not-so Neon Colors design.

Check out those participating bloggers' Friday Fingers below!

*Nail Hug*

Tuesday, November 15, 2011

Ahoy mates!

Last week, a girlfriend asked if I could paint her nails for her hen's party pirates theme. I said yes cos I know I can find ways to create or re-create a design for the theme. So I did!

I found Simply Rins' Pirates nail art VERY helpful.
I re-created the design although I had hard time painting the pirate face.The brrrrride-ter-be and I arrrrre lovin the pirrrrrate skull!

Arrrr!

_DSC0004

_DSC0001

_DSC0002
I had actually forgotten to draw the pirate's eyebrow. Explains the empty look on him. ^__*

*Nail Hug*

Monday, November 14, 2011

FF Theme: Neon Colors

Friday Fingers

Hi!

In previous FF, Edith said something about using too much of pink for her nail art creation and wanted to try other colors such as blue. Well, that sparks an idea.

I have to admit that I, too, don't usually use bright and attention seeker colors. The only attention seeker color that I am fond of is bright red. Other than that are just pink and purple shades. The recent dark blue nail art that i wore for my cousin wedding shows that I am able to pull such colors. So yeah, why not try out to be more adventurous with bright and fancy colors. Go bold. Go NEON COLORS!

You can paint all shades of neon colors.
Or, you can pick just one.
Say yellow.

How to:

  1. Copy the badge above.
  2. Paste the badge on your FF: Neon Colors post and insert the URL link of this page (FF theme: Neon Colors) on the badge.
  3. Publish your FF: Neon Colors entry.
  4. Come back to my FF Theme post by clicking the banner on your entry.
  5. At the bottom of this page, find 'You next, click to enter'.
  6. Fill up the requirements in Linky Tools form. Make sure to fill the URL of your FF: Neon Colors post.
  7. After you are done, go back to this page again and look for 'get the code'. Copy and paste the code at the bottom of your FF: Neon Colors entry.
  8. We are linked for Friday Fingers!


Let's disco in neon light!

*Nail Hug*


Saturday, November 12, 2011

Friday Fingers: Flower Power

Friday Fingers

Hello!

Back for Friday Fingers although at the time I'm posting this, it's already 20 minutes past Friday. Things have been quite tight this week but gladly to say that I can pretty breathe properly now.

I wanted to do Cherry Blossom but reckon it'd be boring to see same thing from me. Daisy's the choice and just love how Simply Rins did her daisies nail art. Determine to paint my nails like hers, I tried painting on fake nail. I thought I did get it pretty close to hers. It's a different case when I tried it on my nails though.

_DSC0003

_DSC0004

They look more like a hybrid of daisy and chrysanthemum. Ha!

I chose dark red as base cos I'm gonna attend a Hen Party tomorrow and it's a themed party; Pirates theme to be exact. Bright fancy colors don't really go well with Pirates. I think.

But I must say, these daisies are pretty easy to do except when doing on my right finger nails. Well, what's new about that?

Enjoy weekend!

*Nail Hug*

Wednesday, November 9, 2011

Tutorial: Overlapping Dots

Hi all!

Initially, I wanted to do the tutorial on water marbling. However, I find it difficult to do just pictorial tutorial cos I tend to skip one or two shots of the process. So, I'm thinking of having it recorded on video of which I need to learn more. So yeah, no water marbling tutorial yet.

But.

I am sharing with you the Overlapping Blue Dots that I posted on my previous Friday Fingers. I love dots but because I am yet to own a proper dotting tool, I can only satisfied myself doing them using DIY tool. That doesn't stop me to do dots design anyway. ^__^

I learned the proper way to do overlapping dots via this link. She's marvelous at nail art and I'm proud to say that she's my number one inspiration now.

So here goes...

od
1. The colors that I used.
2. Paint your nail with the base color.
3. Blob some dark blue (but lighter than the base color) on a piece of paper.

od2
4. Using a dotting tool (you may use same size dotting tool or different size, your pick), create scattered dots.
5. Next, dot some light blue. You may dot away from the previous color but to create overlapping effect, it's better to overlapped the previous color.
6. Same method, use much lighter color. Or in my case, I use metallic aqua blue.
7. Finally, add some white dots on them.

Voila!
dotty blues (5)

Enjoy the tutorial!

*Nail Hug*

Tuesday, November 8, 2011

Pink Leopard Tutorial

Hey!

Today, I'm gonna share with you how I did the pink leopard print nail art for my previous Friday Fingers.

It's pretty easy and I actually love doing it.

The colors that I used. Well, animal prints doesn't necessarily need to be just black, white or brown.
pink leopard (1)
.
.

First, apply the base color (after top coat that is).
pink leopard (2)
.
.

Using darker shade of pink, blob some onto a piece of paper. If you don't have dotting tool (like me), use DIY dotting tool. I used hairpin. Scatter dots of the darker pink on the nails. The dots don't have to be perfect round dot.
pink leopard (5)

.
.

Next, draw the black (refer photo below). I found out the thinner the black lines, the better leopard print effect it gives. So I used toothpick since it creates thinner dots/lines to circle the pink dots.
pink leopard (6)

.
.

There you go...pink leopard print (before applying top coat).
pink leopard (7)

And here's a photo of my previous done nails.
pink leopard print (2)

Enjoy trying!

*Nail Hug*