Worth Clicking Here

Monday, October 31, 2011

FF theme: Lines and Dots

Friday Fingers

Hi everyone!

Here goes the theme for this week Friday Fingers.

Lines.

And/Or...

Dots.

You can go for both or either one.

How to:

  1. Copy the badge above.
  2. Paste the badge on your FF: Lines and Dots post and insert the URL link of this page (FF theme: Lines and Dots) on the badge.
  3. Publish your FF: Lines and Dots entry.
  4. Come back to my FF Theme post by clicking the banner on your entry.
  5. At the bottom of this page, find 'You next, click to enter'.
  6. Fill up the requirements in Linky Tools form. Make sure to fill the URL of your FF: Lines and Dots post.
  7. After you are done, go back to this page again and look for 'get the code'. Copy and paste the code at the bottom of your FF: Lines and Dots entry.
  8. We are linked for Friday Fingers!

Look forward your Friday Fingers girls!!

*Nail Hug*

Sunday, October 30, 2011

Eureka!

OK, I just have to share this with you all.

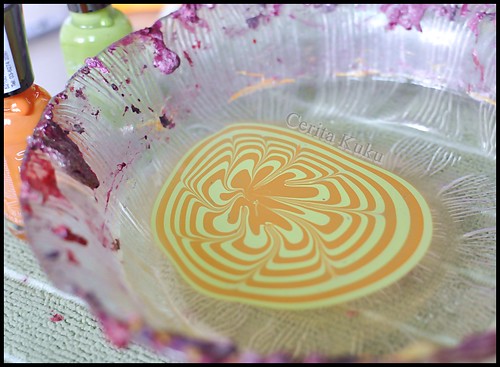
Water Marbling.

Have heard of that? I bet you have.

When I first tried water marbling nail art, it took me a freakin' FOUR hours to complete all ten finger nails and it wasn't a smooth sailing process. Albeit getting it done at the end of the day, I haven't really got the process done perfectly.

I tried again several times after that but failed.

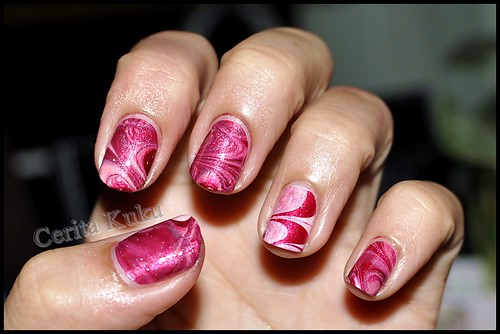
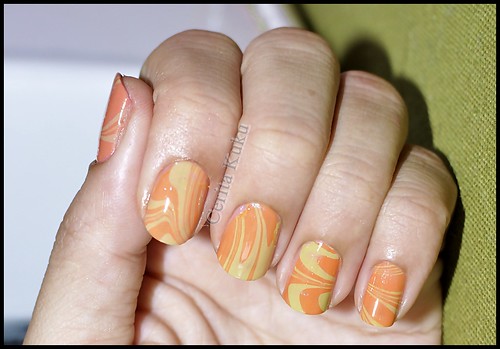
I tried again yesterday and this is what I got.
_DSC0008

I had to do at least two attempts on each finger to get the above photo. That means, no consistency. And the nail polish I was using not helping either. I used Revlon's nail polishes by the way.

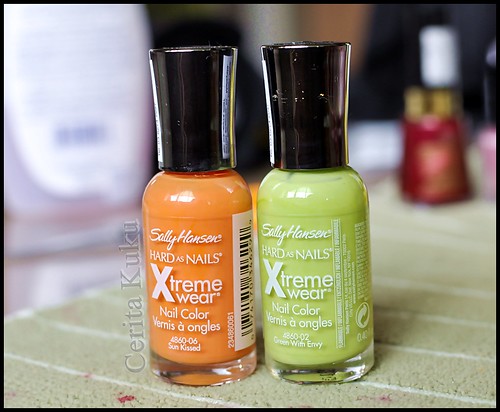
Read somewhere that the final result might be due effect from the selection of nail polish as well. So I remembered my newly bought Sally Hansen colors. Tried two colors; Sunkissed and Green with Envy.
SH sunkissed (10)

Bingo!

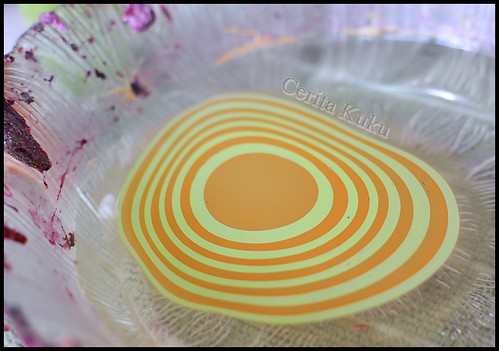
I had no problem dropping the polishes into the water. In fact, I even managed to drop more than ten times and still the whirl effect looks fine.
SH sunkissed (7)

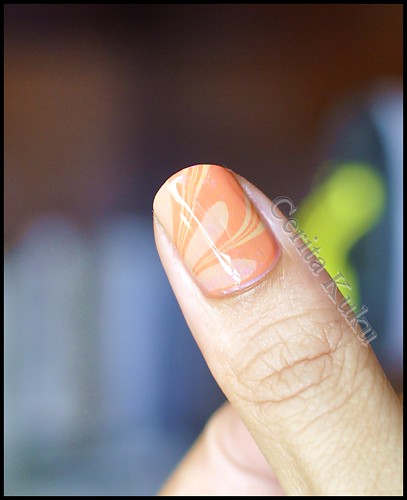
Perfect marbling effect.
SH sunkissed (8)

What do you think?
SH sunkissed (2)
Need to work out on the rough edges along the cticle as well as getting rid of air bubbles.

sallyhansen sunkissed

Took me less than an hour to complete all ten nails and this polishes really hassle and stress-free. The color combo is not my favourite so it definitely means, all the reason to go nail polish shopping again! Excited!

*Nail Hug*

Saturday, October 29, 2011

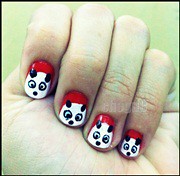
Panda Cuteness

Hello!

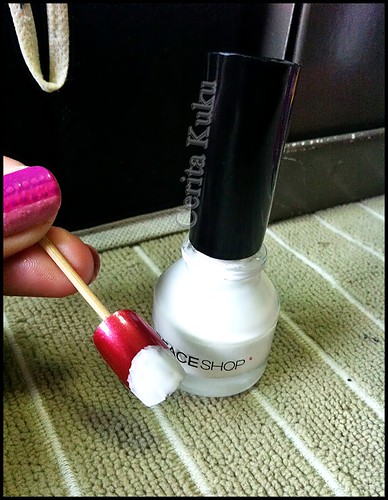
Today, I'm gonna share you how to paint Panda nail art. Actually, I re-created this nail art from Askmewhats.

Tools you need:
Nail polish (Red, black and white), dotting tools or DIY tools like hairpin and toothpick, base coat and top coat.

After applying base coat, paint the base color (red). Make sure to let the polish dry completely.
panda tutorial (1)
.
.

When the red polish is completely dry, apply the white polish to create the face. You don't need to have perfect round shape for this.
panda tutorial (2)
.
.

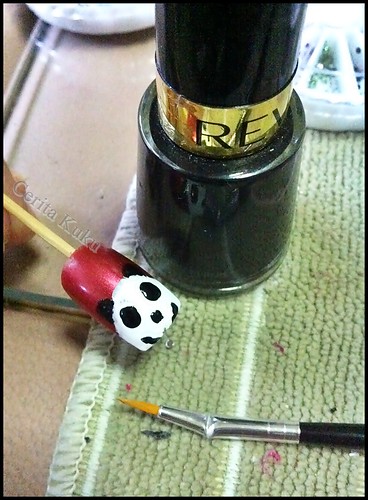
Using bigger size dotting tool, but in my case, since the fake nail is quite big I could just drop the black polish using the brush. Drop two black dots to make the eyes. Use smaller dotting tool or hairpin end to create the nose. You can use fine brush to draw the ears but dotting tool works as fine. I added a smiling mouth on my panda. ^__^
panda tutorial (3)
.
.

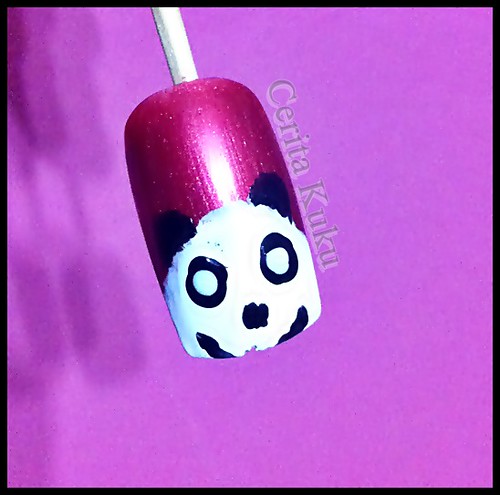
Again, using smaller dotting tool or hairpin, create a white dot inside the black eye.Please ignore the jagged edge of the fake nail  ^___*

panda tutorial (4)
.
.

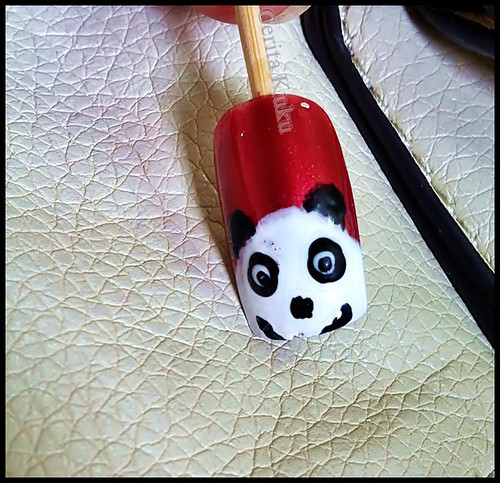
Finally, to make the eyes look realistic, create one more black dot inside the white dot. Apply top coat and voila! You're done!
panda tutorial (5)

Panda siblings I did a while ago.
panda cuteness (1)copy


Enjoy trying!

*Nail Hug*

Friday, October 28, 2011

Friday Fingers!

Friday Fingers

Hello everyone!

Today's the first Friday for our Friday Fingers and I am so excited to share with you my first Friday Fingers.

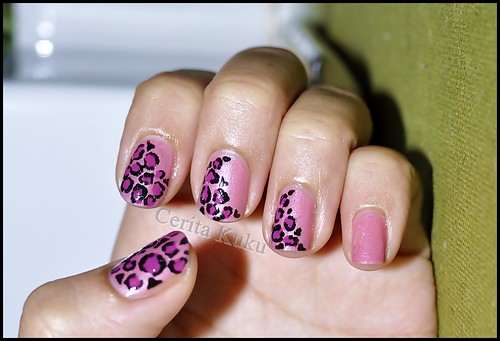
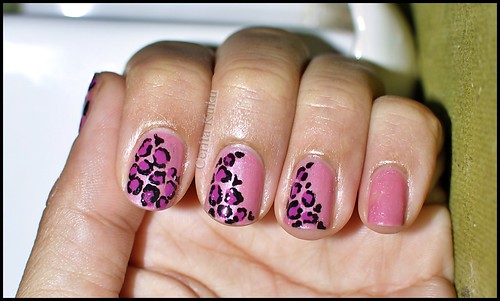
My FF today is inspired by Beaty's suggestion for animal print and the fact that it is the final week of Breast Cancer Awareness Campaign. So yeah, Pink Leopard print!

Today's FF is also specially dedicated to Just as well as Beaty (who is waiting to go for her ultrasound). May you have the utmost courage and will power to sail through rough seas in your fight for breast cancer.

pink leopard print (2)

pink leopard print (1)

Don't forget to post up and link your Friday Fingers: Pink October today!

*Nail Hug*

Thursday, October 27, 2011

Green Envy

Heyyy...

I went out shopping for nail polish again yesterday and look what I found!

.
.

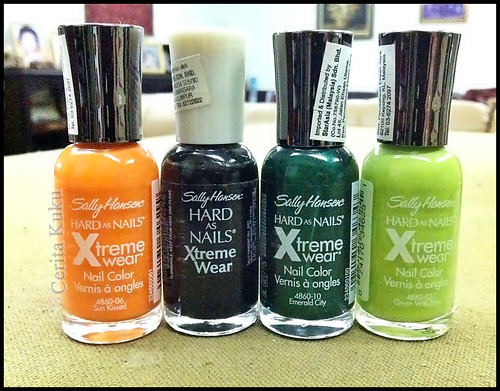
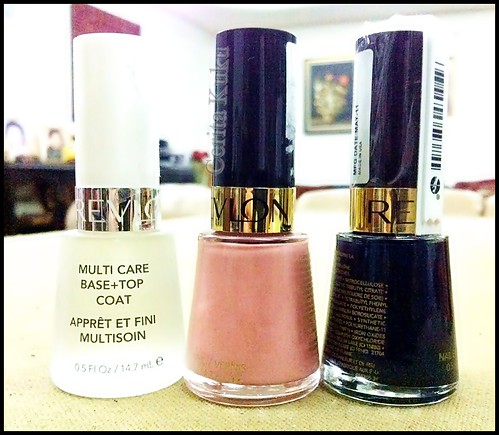
L-R: Sun Kissed, Black Out, Emerald City, Green With Envy (RM19.90 each)
26octBuy (1)
I've been wanting to find good quality nail polish in green hues. I've bought Faceshop's green but I'm not liking how I have to put more than two coats of it to get a nice looking paint. I've seen OPI's green hues and drooling to have the collection but for now, I have to satisfy myself with this Sally Hansen. I haven't try it on my nail but I think I love the Green With Envy shade. ^__^

.
.


Multicare Base + Top Coat, Opulent Pink, Midnight Affair
26octBuy (2)

Since I have ran out of pastel pink shades, thought I could get one at Revlon. Too bad, the pink shade that I wanted ran out of stock too. Instead, I bought the above. The Midnight Affair was a mistake though. I wanted to buy a black number but was mistaken the Midnight Affair (very dark metallic blue) for black. Worst is, I already have the Midnight Affair in my collection.
.
.

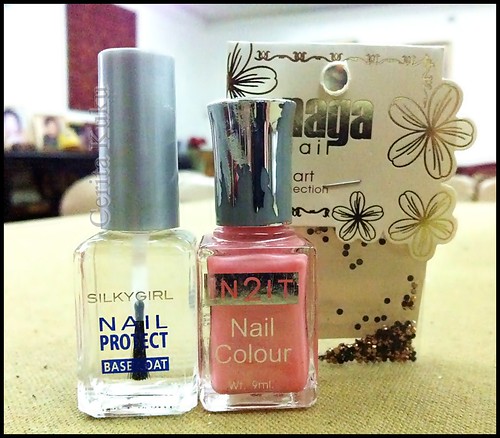
Base Coat by Silky Girl, In2It Zesty Pink and black rhinestones by Naga.
26octBuy (3)

Can't wait to try 'em Sally Hansens on my nails.

In the mean time, don't forget to join my first Friday Fingers!

*Nail Hug*

Tuesday, October 25, 2011

Clean Up ee-zi

Hey!

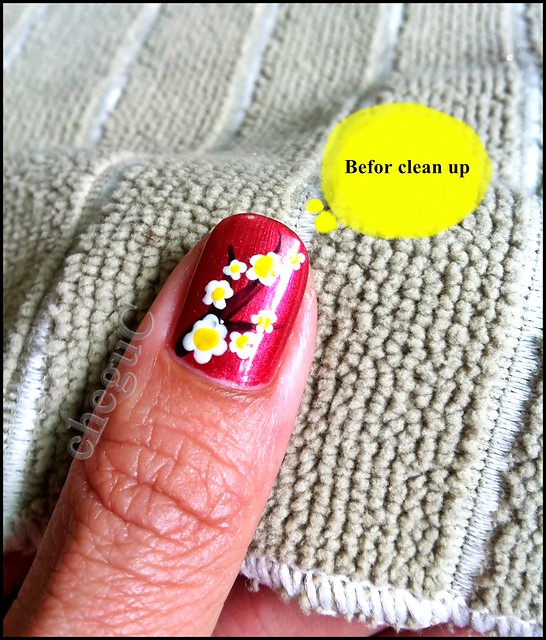
Now, I know most of you have this problem when it comes to applying nail polish. Smudges on the cuticle. Me too. I envy those nail bloggers who posted neat manicure without a single smudge on their cuticle. Then, I stumbled upon a nail blog that shows how to do clean up the easiest way. It really helps although I am yet to master the skill properly especially when cleaning up on my right fingers.

Anyways, here's a picture tutorial to show how...
.
.

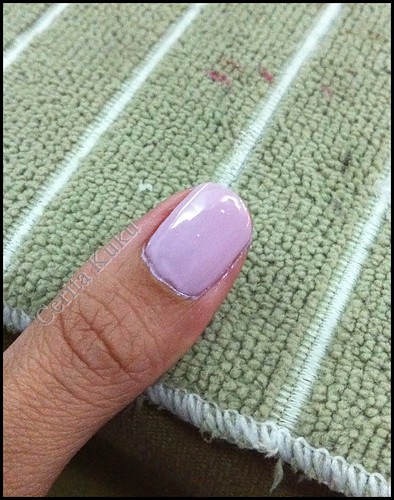
Smudges along my cuticle.
clean up (2)

.
.

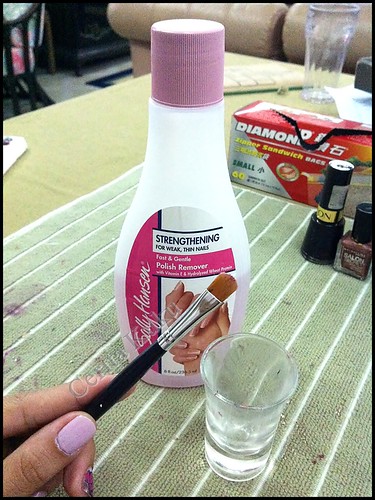
You need these.
clean up (3)
.
.

Dip the brush in the acetone/polish remover and start cleaning up along the cuticle.
clean up (4)
.
.

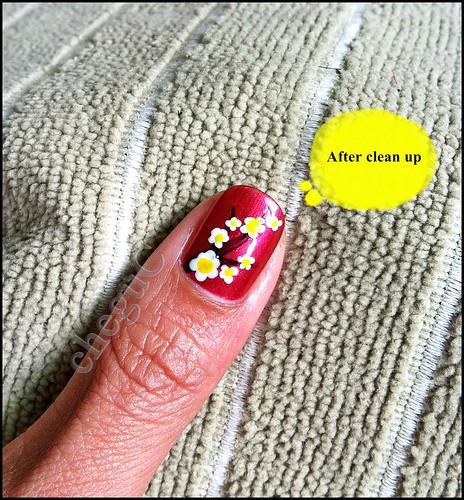
There you have it, neat manicure!
clean up (1)

Good luck!

*Nail Hug*

Monday, October 24, 2011

Hear me roarrr!

This is my first attempt to do leopard print nail art. Beaty asked me to try it and so I did. But since my nails were freshly painted, I just tried this on fake nail.

leopard print3


Will try again on my nails!

In the mean time, don't forget to join my Friday Fingers!

*Nail Hug*

Sunday, October 23, 2011

Dry Water Marble

I've always love the wet water marble effect when I first did it last year. But the tedious process and not forgetting the stress it gives halted my intention to do it again. Well, I have re-tried doing it actually. Just that, it didn't work out well like the first time I did.

While googling for more ideas of water marbling, I found a blog that tells about another much easy way of creating marble nail art.

Dry Water Marble!

marble

I'll share about the How-To on this nail art soonest!

In the mean time, don't forget to join the Friday Fingers!
*Nail Hug*

FF theme: Go for Pink!

Friday Fingers

Today is Sunday, right?
Let's start with Friday Fingers theme!!!

The theme for next week's Friday Fingers is.... PINK OCTOBER!
Since next week is the final week of October, just to show how much we care for this awareness campaign, let's have one day dedicated to raising awareness for Breast Cancer campaign. You are welcome to add other links in order to support this campaign. All for good cause, aye?

Design anything from plain pink to very artsy-fartsy pink nails. Your choice. As long as it has pink element in it. It will be a bonus if you paint a pink ribbon on it. :)

How to?

  1. Copy the badge above.
  2. Paste the badge on your FF: Pink October post and insert the URL link of this page (FF theme: Go Pink) on the badge.
  3. Publish your FF: Pink October entry.
  4. Come back to my FF Theme post by clicking the banner on your entry.
  5. At the bottom of this page, find 'You next, click to enter'.
  6. Fill up the requirements in Linky Tools form. Make sure to fill the URL of your FF: Pink October post.
  7. After you are done, go back to this page again and look for 'get the code'. Copy and paste the code at the bottom of your FF: Pink October entry.
  8. We are linked for Friday Fingers!

NOTE: Friday Fingers post is meant to be published on Fridays. So be sure to post this up on Friday. But if you can't, there's always weekend to post them up. ^__^

Looking forward your first Friday Fingers!

*Nail Hug*


Friday, October 21, 2011

Intro: Friday Fingers

Hey!

Oukay, so Lizee has come up with this brilliant idea and I LOVE it.

She suggested that we have this one day dedicated to our..urrm..nails! You know, I know that we don't have the privilege to beautify our nails every single day. Like me, I only get to pamper my nails during the weekend. Friday being the earliest to paint them.

Sooo... let's have one day in a week to prettify our nails and flaunt them! Let's have Friday to show 'em off. And let's call it Friday Fingers...just like what Lizee suggested.

How do we do this?
Easy.

I will post ONE theme every Sunday. Comes Friday, you (if you are participating) post 'em  pretty nails on your blog!

The theme will be something like this 31 Day Challenge.


I only have one question.
Do you think I should make a linky tools? You know, like getting everyone who's participating to fill up certain form and link back to my Friday Fingers? This will enable all those who participated to hop over to each other blog and see what we have come up with for Friday's Fingers.

So yeah, response, response.

*Nail Hug*

Pinky love

Happy Friday!

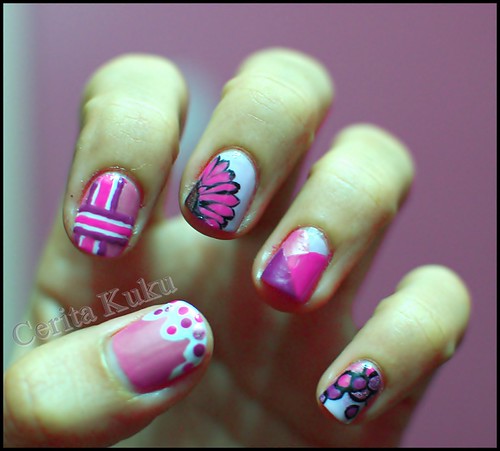
Here's five samples of nail art I made for the Pink October campaign. And I'm wearing all 5 of them on my left fingers while the right fingers are left bare. Seriously.


color collection2
Thumb finger : Pink Candy
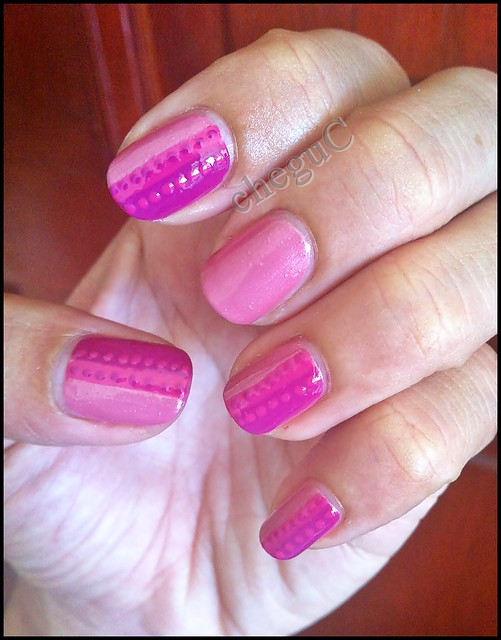
Index finger : I'm all for lines. This particular overlapping lines is inspired by my pinkish bath towel!
Middle finger : I saw a sunflower nail art and was inspired to draw something like it. Since I love Gerbera, fuchsia Gerbera is just perfect!
Ring finger : Something I saw in one of the nail websites I frequented, Zig Zag.
Pinky : Circles. I love anything round as well and this one is something different from the usual dotting design.

Enjoy!

*Nail Hug*

Monday, October 17, 2011

Mauve Oceanblue (Gradient Purple Bling)

Hey!

The title sounds cool, right? Well, that's the name given by Wyne for today's How-To.

Actually, Wyne requested that I created a nail art design for her to wear during her Bollywood themed event next month. The theme color is purple with bling-bling. Now, that's Bollywood alright.

So today, am gonna share with you how I make this gradient purple bling nail design. The method used involves sponging to create gradient.

These are the colors I used.
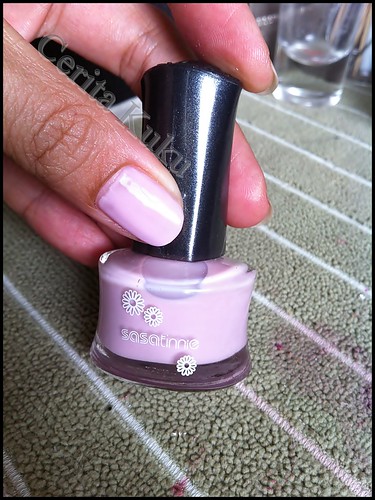
---> Fantasy Color (for sasatinnie) in FCW029, FCW006, FCROS009, FCGL002 and Faceit by TheFaceShop SL211.
purple bling (1)
.
.

After putting base coat, apply the base color (FCW029). Let to dry completely.
purple bling (2)
.
.

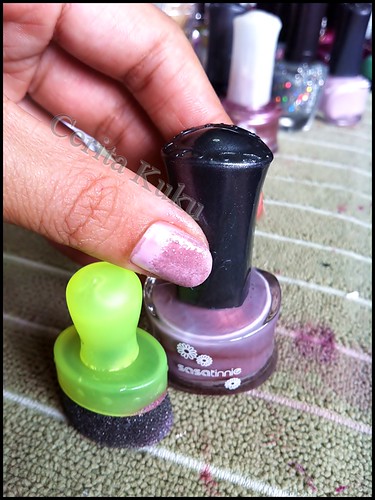
Using a nail sponge (you can use household sponge or make-up sponge  too actually), drop some FCW006 on the sponge and dab on the nail, making a gradient. Dry completely.
purple bling (3)
.
.

Same method, dab the FCROS009 creating gradient as well.
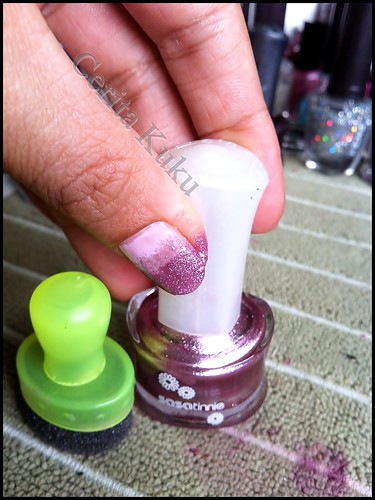
purple bling (4)
.
.


Using a self-adhesive French Manicure tip (mine is by Sally Hansen), paint the tip of the nail using the FCGL002. You can use Scotch tape or masking tape in the absence of the self-adhesive French Mani tip.
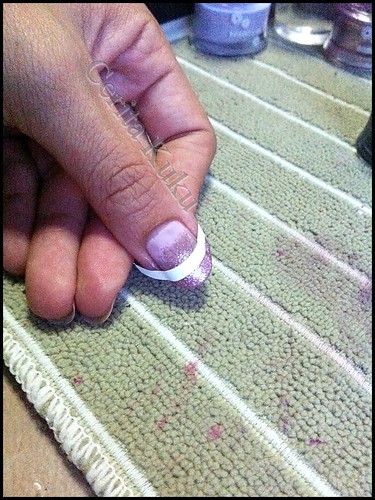
purple bling (5)
.
.

Add on some various size purple rhinestones when the final paint is slightly tacky. Do not wait till dry otherwise it's hard to stick on the rhinestone. You can arrange the rhinestone on straight lines or in my case, I created a slight curves to accentuate the gradient line.
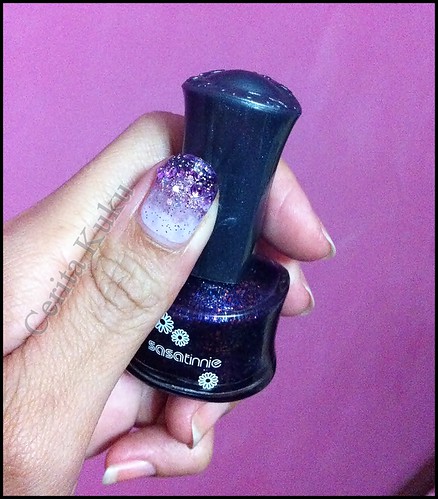
purple bling (6)
.
.


Final step is to apply top coat to seal the rhinestones. In my case, I use glitter nail polish that has the combination of small and medium glitters. Just to add more bling to it.
.
.

Voila!
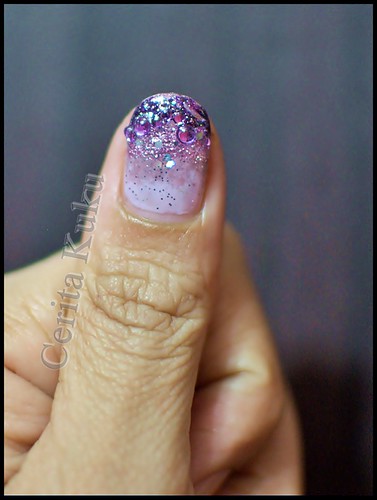
purple bling (7)

Important reminder again, make sure each color is COMPLETELY dry before applying the next one except the final color.

Happy trying girls and Wyne, hope you will have magnificent bling-bling fingers during that night!

*Nail Hug*
Sunday, October 16, 2011

New stash

After using DIY dotting tool for a while, I feel that I NEED to find proper dotting tools. As far as I know, it's hard to find one in KK. So when Beaty said she saw one at Daiso, I quickly head to Daiso to look for it.

Unfortunately, I didn't find dotting tools. But, I did buy a nail art brush as well as mini line brush that comes in pack of 6!

Then, I went to Sasa knowing I could find something useful there. And so I did.
.
.

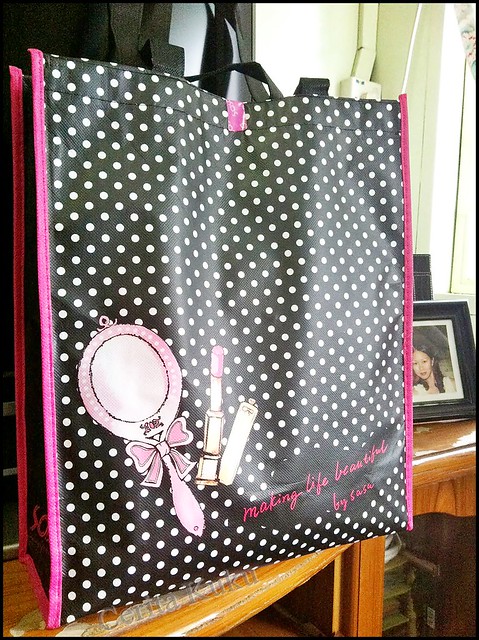
I got pretty shopping bag from Sasa.
mystash (1)

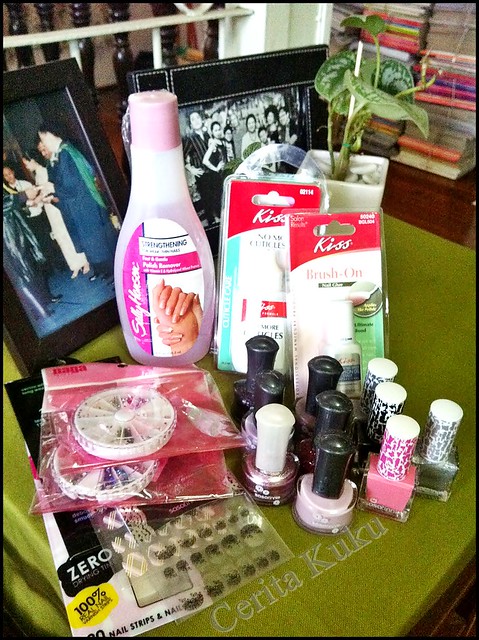
Stuffs I bought from Sasa.
--> Sally Hansen nail polish remover, Cuticle clipper, Kiss cuticle remover, Kiss brush on nail glue, colorful rhinestones in carousal packaging (two sizes), Instant French Manicure strips,  Nail Gel Art (something like sticker), Nail Art Foil, Grafitti Nail Top (similar to crack nail polish) in Grey, Pink, Glittering Silver, Black and 6 Fantasy Color nail polish (buy 2 get 1 free).
mystash (2)

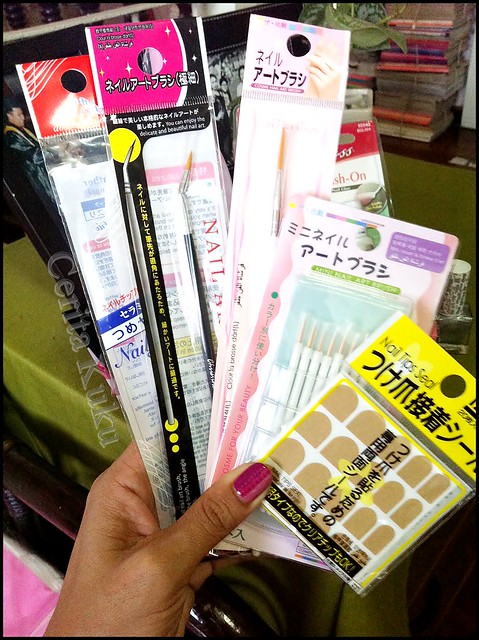
Stuffs I bought from Daiso.
--->  Nail file, (bended) nail art brush, line brush, mini line brush (in 6) and nail tips seal.


mystash (3)

Verdict:
I love the Fantasy Color nail polish. Two coats is enough to get perfect paint unlike The Face Shop nail polish that always need more than twice of coating otherwise it will result in streaking effect. (MYR8.90/Buy 2 Free 1)

The Grafitti Top (crack) nail polish is as good too. I haven't tried all the colors but the pink and black do gives a nice crack effect. Just as I wanted it. And it's cheap! (MYR14.90 each)

I tried the bended nail art brush to draw the pink ribbon picture and it works beautifully. Love it! (MYR5)

*Nail Hug*

Saturday, October 15, 2011

Pink October 2nd Design

Hi polishaholics!

Today I have created a second design specially for the Breast Cancer Pink October campaign. My first design can be found HERE.

Initially, I did not want to opt out the pink ribbon. But later decided that as long as the design comes in pink shades, that would do. So no pink ribbon for today.

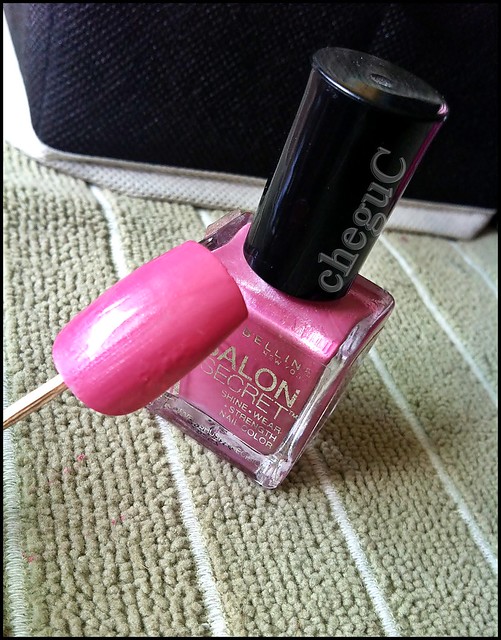
These are the colors I used. Plus, you have to prepare a scotch tape just in case you have shaky hands like me and unable to draw straight lines.

pink oct TWO (1)
.
.

Paint the base color. Let to dry completely.
pink oct TWO (5)
.
.

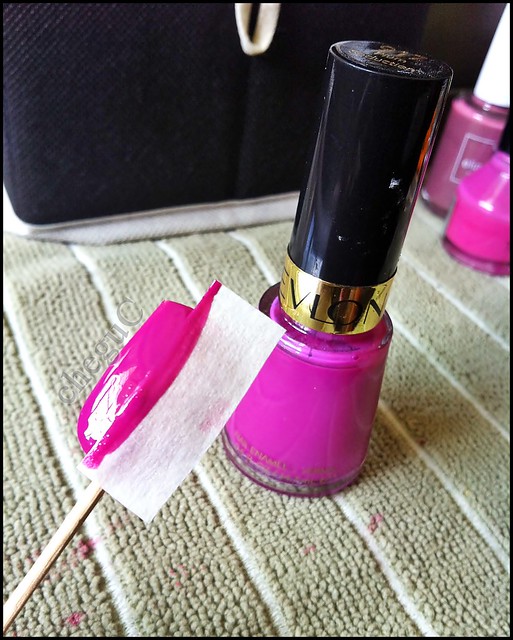
Use the scotch tape (or in this case, I have also used a masking tape). Then, paint the second color. Let to dry completely.
pink oct TWO (4)
.
.

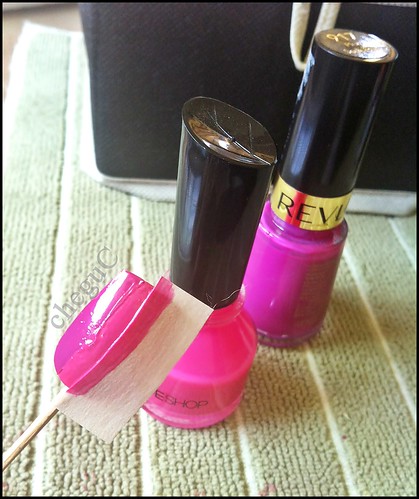
Same step, paint the third color and let to dry completely.
pink oct TWO (3)
.
.

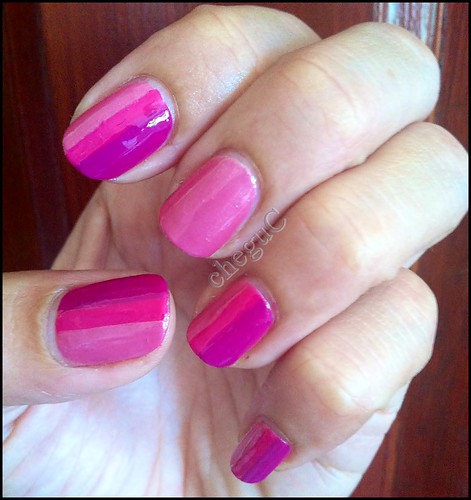
Top with top coat and voila!
pink oct TWO (7)
.
.

Or, if you think that looks too plain, you can add some dots like I did here.
pink oct TWO (6)

Enjoy trying!

*Nail hug*
Thursday, October 13, 2011

Cherry Blossom

This is one design that I really love for two reasons. First, cherry blossom itself is already something pretty to look at and second, I can do this very well! Ha!

Here goes...


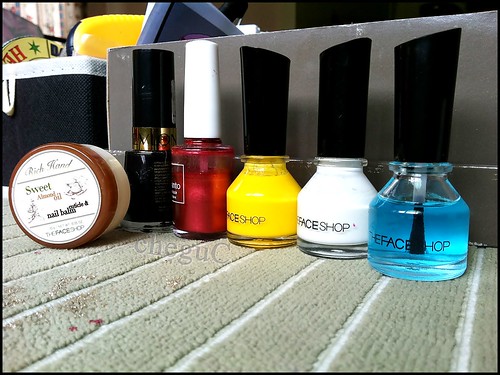
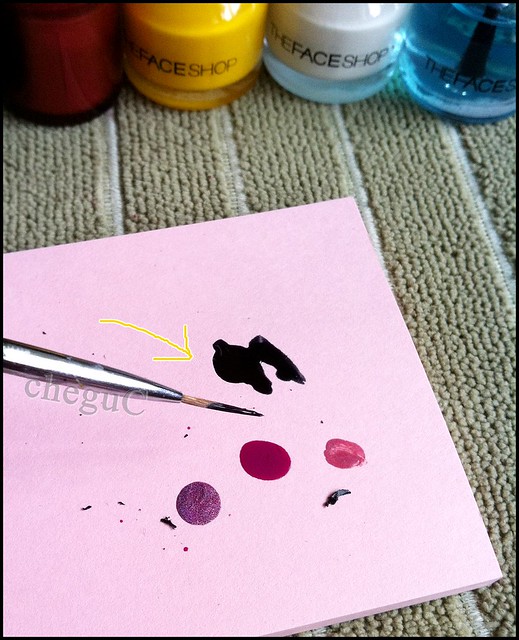
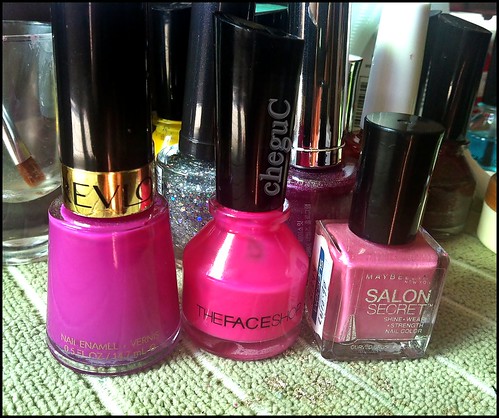
These are colors you will need. But don't be rigid with them colors. You can be adventurous by trying other swatches too.
IMG_1721
.
.


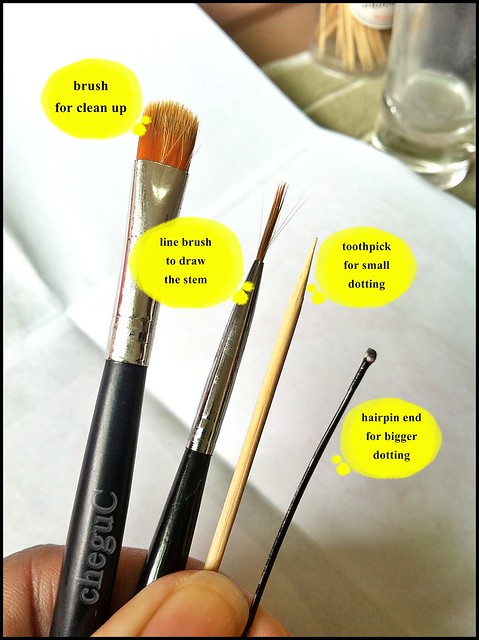
The tools needed. Toothpick and hairpin are another form of DIY dotting tool if you don't have one (like me).
IMG_1722
.
.


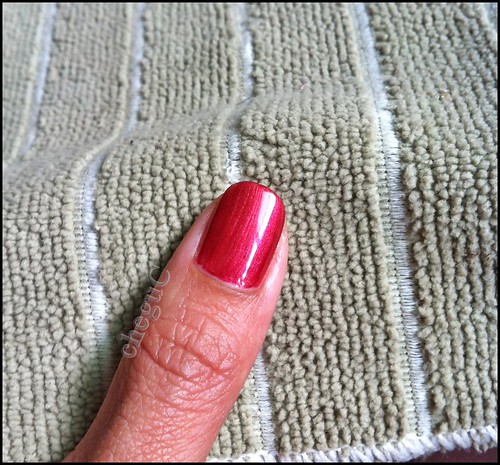
After putting on top coat (which is important especially if you are applying dark base colors such as red to prevent yellow nails), apply the base color (red).
IMG_1727
.
.


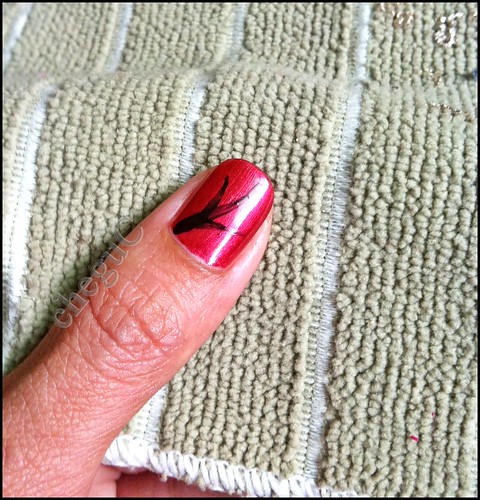
Drop a few drop of the black polish on a piece of paper. Use the line brush to draw the branches.
IMG_1728

Practice is key to perfection. ^___^
IMG_1729
.
.


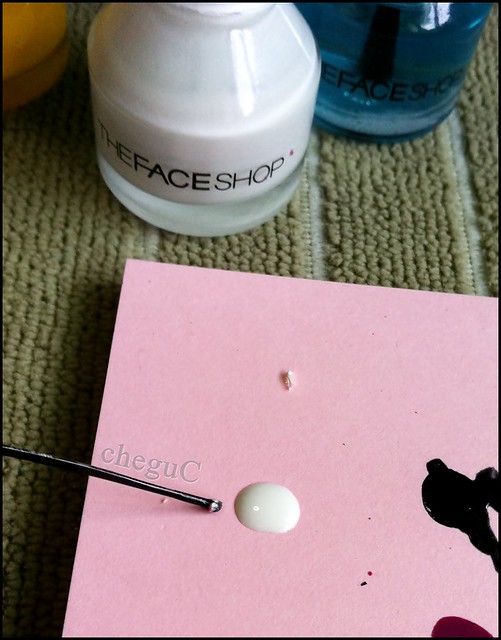
Next, drop some white polish. Use the hairpin to make big dots and toothpick for smaller dots.
IMG_1730
.
.

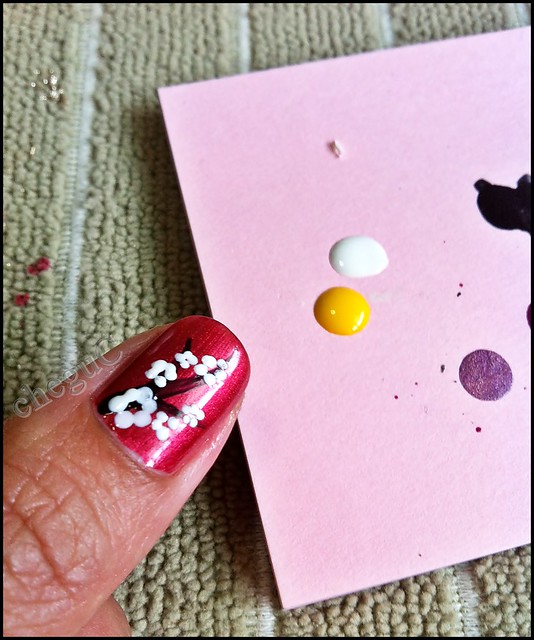
Create a round chain-like dots to form the petals. Dot yellow polish in the center of the white dots.
IMG_1731
.
.


Use the art brush by dipping it into a pure acetone base nail polish remover and clean up the smudges or smoothen out the nail polish near the cuticle.
IMG_1733
.
.

Apply top coat and Voila!
IMG_1737

Happy trying!

*Nail Hug*